basic setup Creating interactive applications for a limited number of LED panels can be understood as the development of an …
basic setup
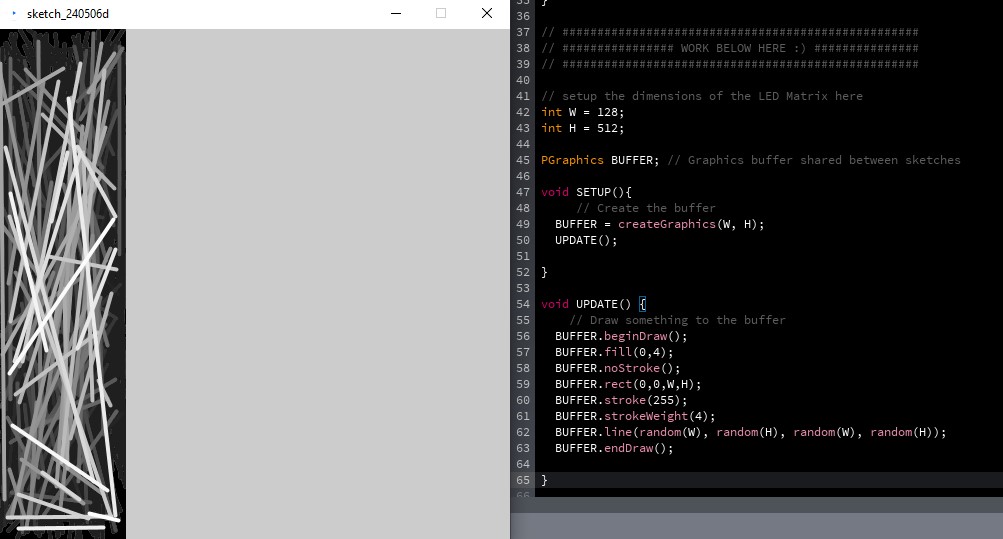
Creating interactive applications for a limited number of LED panels can be understood as the development of an application for a second screen of a pretty limited dimension. Therefore it comes handy to create a simple custom framework to both deploy the panel screen and a primary monitor for development and advanced control during the installation. This can become quiet complicated soon, so for conveience, i created a wrapper script, that takes care of all buffers, placements and checks. One simple skew is needed indeed: Instead of using the common „setup“ and „draw“ function, simply use the custom „SETUP“ and „UPDATE“ functions. This framework core may not be touched in general – just copy paste it in your project.
*The framework has a development mode switch integrated. ( bool devmode ) This is needed to focus processing power to the development monitor or the actual LED panels.
ProjectorSketch projectorSketch;
boolean devmode = true;

void setup() {

  size(512, 512); //setup the primary Monitor sketch size
  SETUP(); // execute the custom SETUP
  projectorSketch = new ProjectorSketch();  // Create an instance of ProjectorSketch

  // Run the ProjectorSketch
  String[] args = {"--display=2", "--present", "Projector"};
  PApplet.runSketch(args, projectorSketch);

}

void draw() {
    // Display the buffer
    image(BUFFER, 0, 0);
    // Update the buffer
   if(!devmode){UPDATE();}
}


class ProjectorSketch extends PApplet {
  void settings() {
    fullScreen(JAVA2D);
  }

  void draw() {
    // Draw the buffer on the projector sketch
    // Update the buffer
   if(devmode){UPDATE();}else{image(BUFFER, 0, 0);}

  }
}

// ###################################################
// ################ WORK BELOW HERE :) ###############
// ###################################################

// setup the dimensions of the LED Matrix here
int W = 128;
int H = 512;

PGraphics BUFFER; // Graphics buffer shared between sketches

void SETUP(){
     // Create the buffer
  BUFFER = createGraphics(W, H);
  UPDATE();

}

void UPDATE() {
    // Draw something to the buffer
  BUFFER.beginDraw();
  BUFFER.fill(0,4);
  BUFFER.noStroke();
  BUFFER.rect(0,0,W,H);
  BUFFER.stroke(255);
  BUFFER.strokeWeight(4);
  BUFFER.line(random(W), random(H), random(W), random(H));
  BUFFER.endDraw();

}
advanced setup
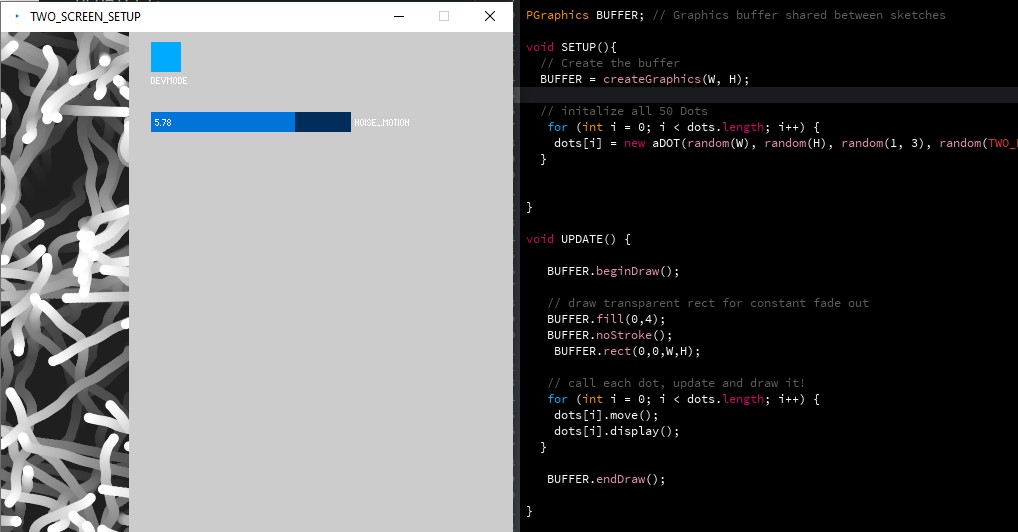
The advanced setup comes with p5control, an additional* UI for Processing – very handy for generative design development. ( *needs to be installed for your IDE! ) In the example, we instantiate 50 custom class objects called aDOT. These objects will then be updated each frame and drawn to the buffer.
ProjectorSketch projectorSketch;
import controlP5.*;
ControlP5 cp5;

//setup the UI values here
boolean devmode = true;
float noise_motion = 0;

void setup() {

  size(512, 512); //setup the primary Monitor sketch size
  setupUI(); // initialized the p5 contol UI
  SETUP(); // execute the custom SETUP
  projectorSketch = new ProjectorSketch();  // Create an instance of ProjectorSketch

  // Run the ProjectorSketch
  String[] args = {"--display=2", "--present", "Projector"};
  PApplet.runSketch(args, projectorSketch);

}

void setupUI(){

   cp5 = new ControlP5(this);

  int xpos = 150;

     // create a devmode toggle
  cp5.addToggle("devmode")
     .setPosition(xpos,10)
     .setSize(30,30)
     ;
  // create a simple slider
    cp5.addSlider("noise_motion")
     .setPosition(xpos,80)
     .setRange(.1,8)
     .setSize(200,20)
     ;
}

void draw() {
    // Display the buffer
    image(BUFFER, 0, 0);
    // Update the buffer
   if(!devmode){UPDATE();}
}


class ProjectorSketch extends PApplet {
  void settings() {
    fullScreen(JAVA2D);
  }

  void draw() {
    // Draw the buffer on the projector sketch
    // Update the buffer
   if(devmode){UPDATE();}else{image(BUFFER, 0, 0);}

  }
}


// ###################################################
// ############ MAINLY WORK BELOW HERE :) ###############
// ###################################################


// setup the dimensions of the LED Matrix here
int W = 128;
int H = 512;

aDOT[] dots = new aDOT[50]; // create 50 dot objects

PGraphics BUFFER; // Graphics buffer shared between sketches

void SETUP(){
  // Create the buffer
  BUFFER = createGraphics(W, H);

  // initalize all 50 Dots
   for (int i = 0; i < dots.length; i++) {
    dots[i] = new aDOT(random(W), random(H), random(1, 3), random(TWO_PI));
  }


}

void UPDATE() {

   BUFFER.beginDraw();

   // draw transparent rect for constant fade out
   BUFFER.fill(0,4);
   BUFFER.noStroke();
    BUFFER.rect(0,0,W,H);

   // call each dot, update and draw it!
   for (int i = 0; i < dots.length; i++) {
    dots[i].move();
    dots[i].display();
  }

   BUFFER.endDraw();

}

// ###################################################

class aDOT {
  float x, y; // Position
  float speed; // Speed
  float angle; // Angle of movement

  aDOT(float x_, float y_, float speed_, float angle_) {
    x = x_;
    y = y_;
    speed = speed_;
    angle = angle_;
  }

  void move() {
    // Move the dot
    x += cos(angle) * speed;
    y += sin(angle) * speed;

    x+=  (noise(x*.05,y*.04)-.5)*noise_motion;
    x+=  (noise(y*.05,x*.04)-.5)*noise_motion;


    // Check if dot is outside the stage
    if (x < 0) {
      x = W;
    } else if (x > W) {
      x = 0;
    }
    if (y < 0) {
      y = H;
    } else if (y > H) {
      y = 0;
    }
  }

  void display() {
    // Display the dot

    BUFFER.fill(255);
    BUFFER.ellipse(x, y, 10, 10);
  }
}
camera feed setup
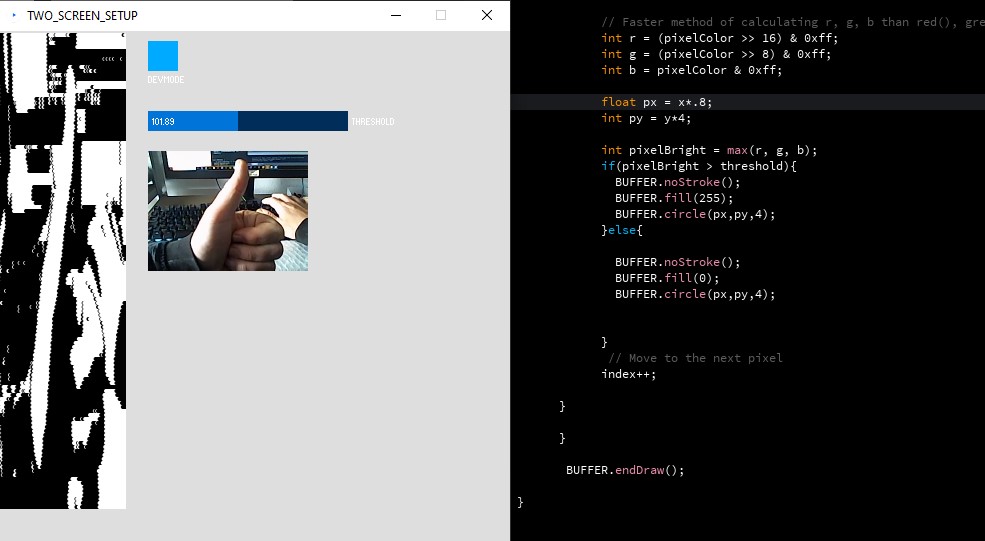
As sensory input we can feed a camera in the application. In this basic setup, a camera is called with a very low resolution of 160×120 pixels. Each frame, the brightness of each pixel is calculated and combined with a simple threshold if case.
ProjectorSketch projectorSketch;
import controlP5.*;
ControlP5 cp5;

//setup the UI values here
boolean devmode = true;
float threshold = 0;

void setup() {

  size(512, 512); //setup the primary Monitor sketch size
  setupUI(); // initialized the p5 contol UI
  SETUP(); // execute the custom SETUP
  projectorSketch = new ProjectorSketch();  // Create an instance of ProjectorSketch

  // Run the ProjectorSketch
  String[] args = {"--display=2", "--present", "Projector"};
  PApplet.runSketch(args, projectorSketch);

}

void setupUI(){

   cp5 = new ControlP5(this);

  int xpos = 150;

     // create a devmode toggle
  cp5.addToggle("devmode")
     .setPosition(xpos,10)
     .setSize(30,30)
     ;
  // create a simple slider
    cp5.addSlider("threshold")
     .setPosition(xpos,80)
     .setRange(44,224)
     .setSize(200,20)
     ;
}

void draw() {
    // Update the buffer
  if( devmode){UPDATE(); image(BUFFER, 0, 0);}

}


class ProjectorSketch extends PApplet {
  void settings() {
    fullScreen(JAVA2D);
  }

  void draw() {
    // Draw the buffer on the projector sketch
     if(!devmode){UPDATE(); image(BUFFER, 0, 0);}

  }
}

// ###################################################
// ############ MAINLY WORK BELOW HERE :) ###############
// ###################################################


// setup the dimensions of the LED Matrix here
int W = 128;
int H = 512;


import processing.video.*;
PGraphics BUFFER; // Graphics buffer shared between sketches

Capture video;

void SETUP(){
  // Create the buffer
  BUFFER = createGraphics(W, H);
  BUFFER.smooth();
  BUFFER.beginDraw();
  BUFFER.background(222);
  BUFFER.endDraw();

  video = new Capture(this, 160, 120);

  // Start capturing the images from the camera
  video.start();


}

void UPDATE() {

     background(222);


     set(150, 120, video);


      BUFFER.beginDraw();

      int index = 0;
     video.loadPixels();
      for (int y = 1; y < video.height; y++) {


        for (int x = 0; x < video.width; x++) {

            int pixelColor = video.pixels[index];


            // Faster method of calculating r, g, b than red(), green(), blue()
            int r = (pixelColor >> 16) & 0xff;
            int g = (pixelColor >> 8) & 0xff;
            int b = pixelColor & 0xff;

            float px = x*.8;
            int py = y*4;

            int pixelBright = max(r, g, b);
            if(pixelBright > threshold){
              BUFFER.noStroke();
              BUFFER.fill(255);
              BUFFER.circle(px,py,4);
            }else{

              BUFFER.noStroke();
              BUFFER.fill(0);
              BUFFER.circle(px,py,4);


            }
             // Move to the next pixel
            index++;

      }

      }

       BUFFER.endDraw();

}


void captureEvent(Capture c) {
  c.read();
}