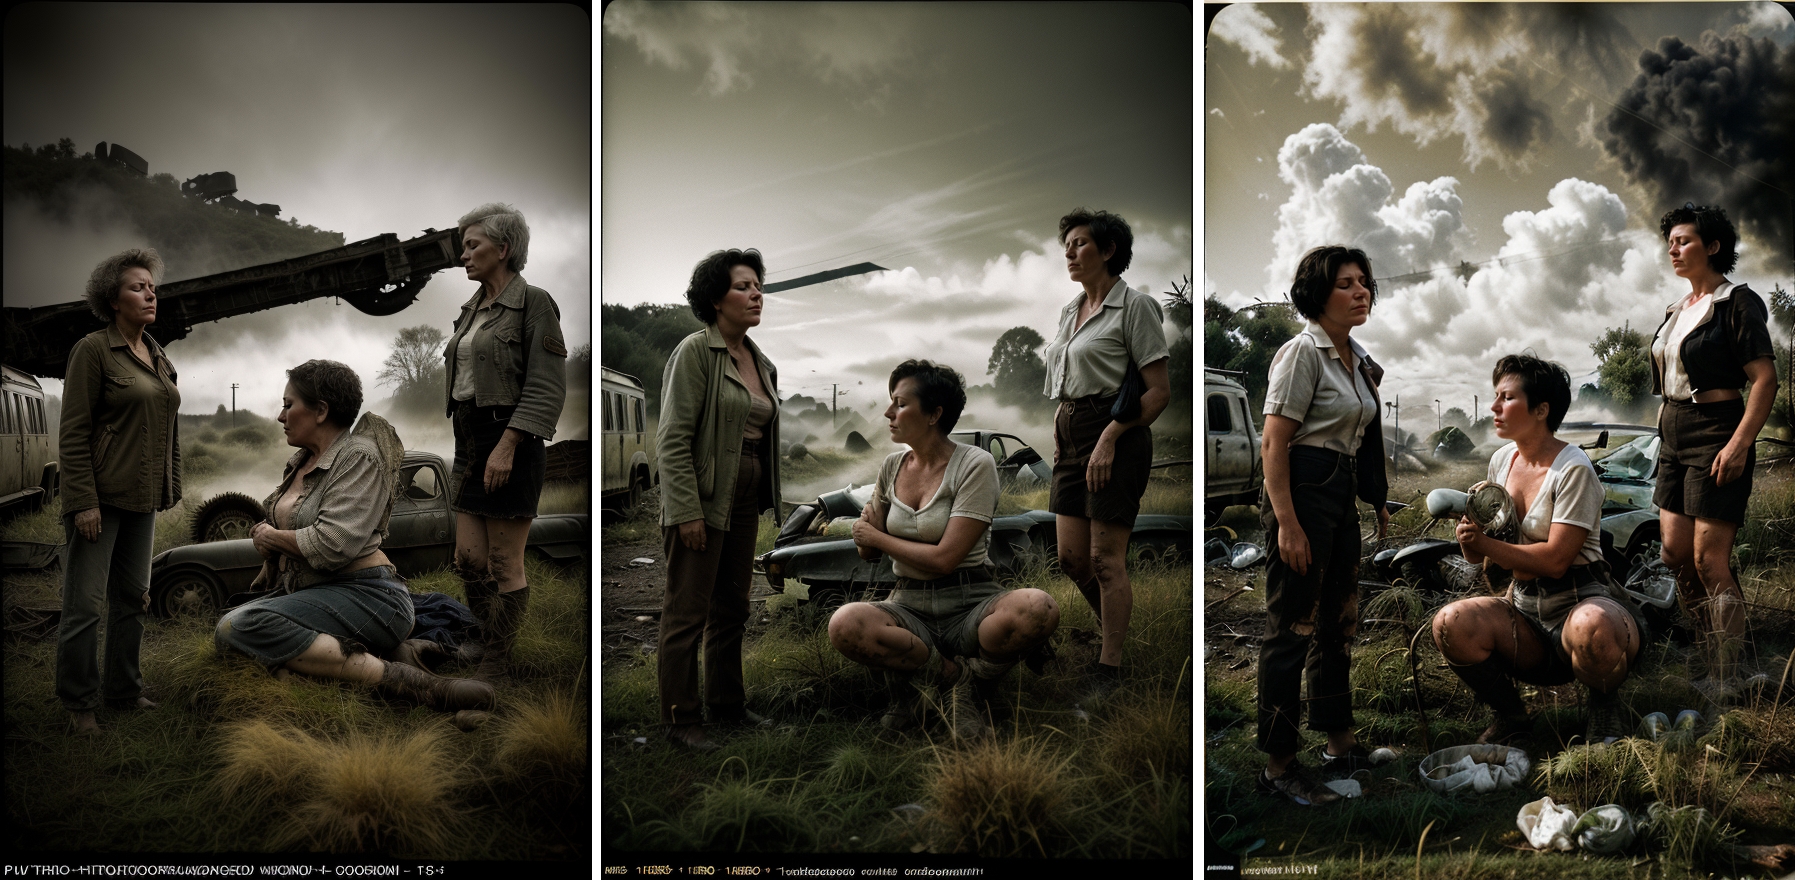
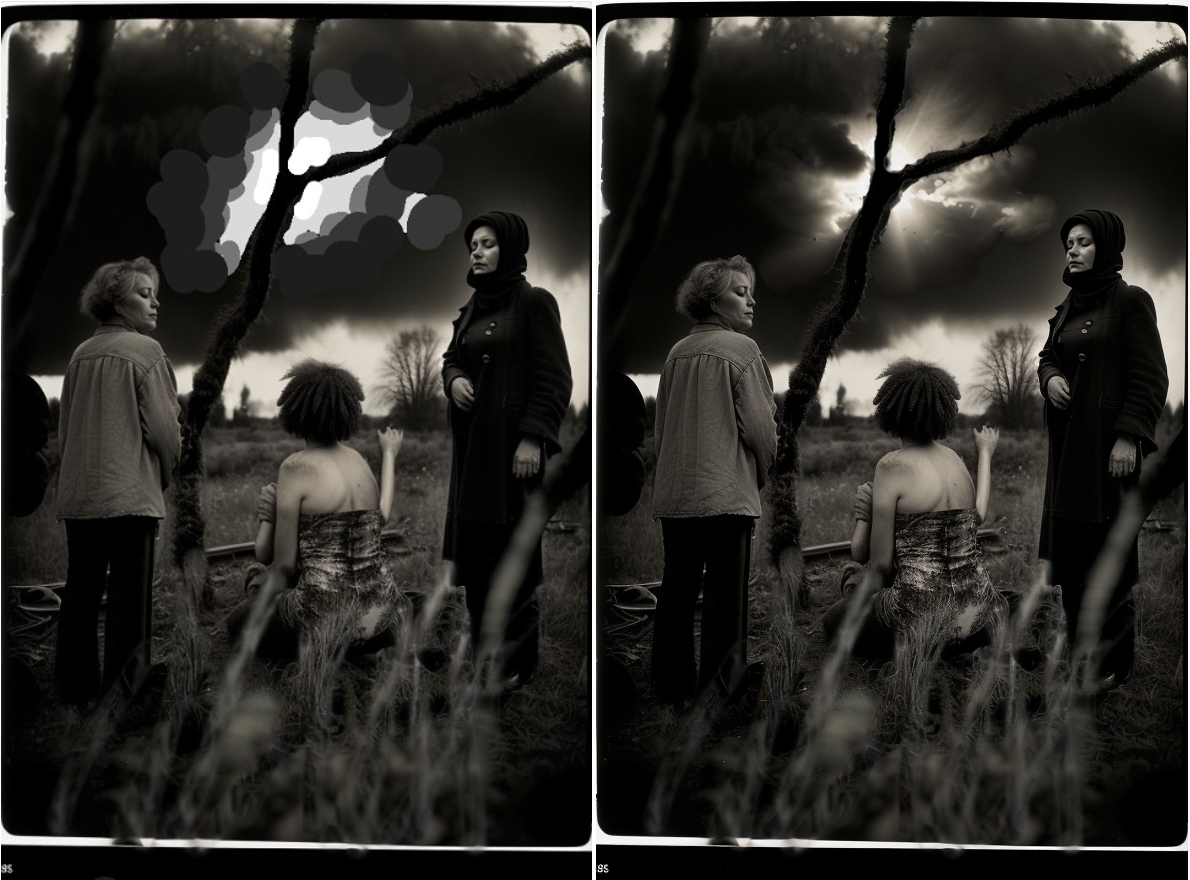
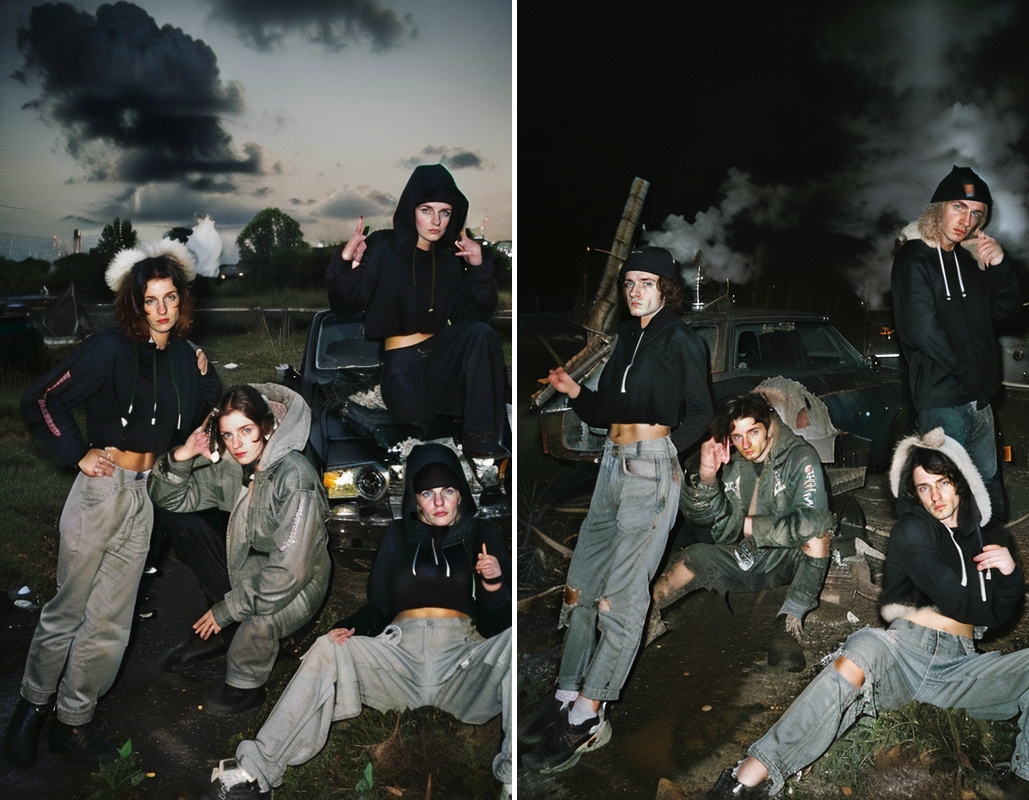
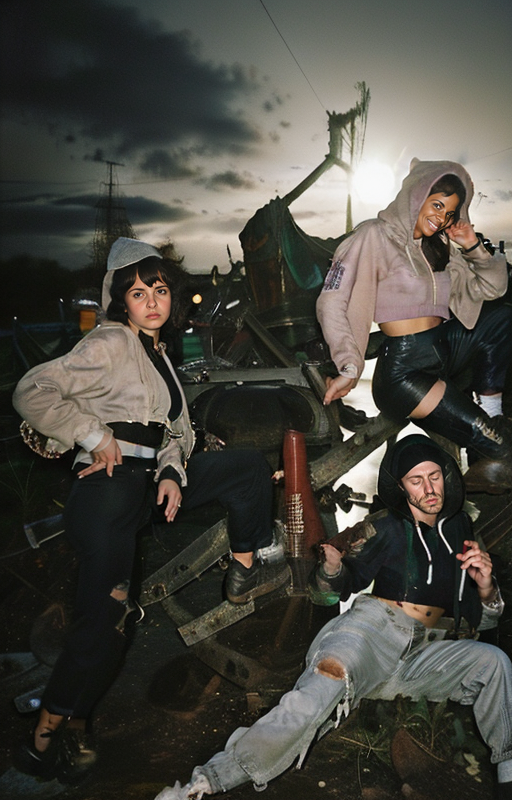
With additonal LORA networks, we can guide the rendering process in very delicate ways. As each of these models come with specific characteristica itself, it is importaint to keep in mind, that all LORA models can be combined with one another in a balanced way. In this example, we start off with a segement map of a motif we like to generate. Along with a proper prompt and checkpoint model, we can generate a basic photographic motif as a base for manipulation.
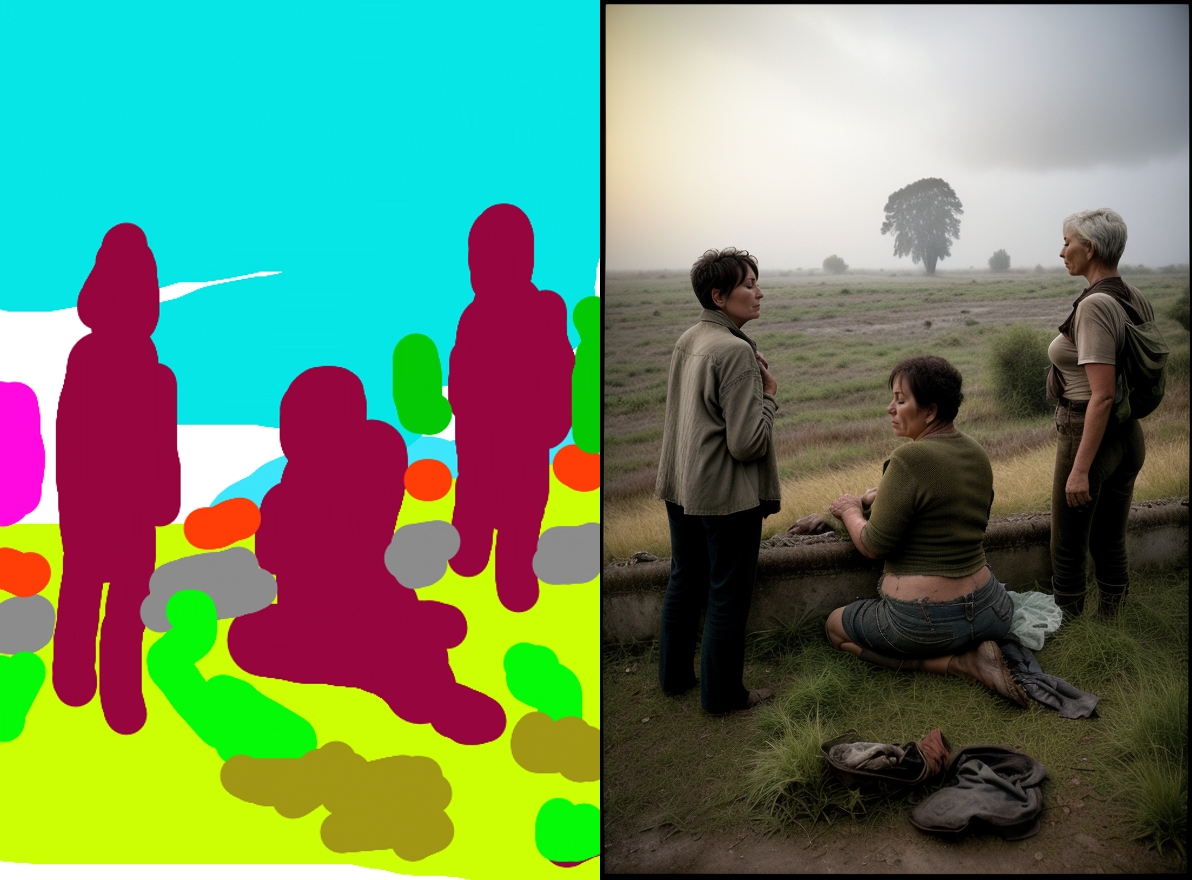
black white analog photography of ( three mid aged european women looking to the side concerned with distressed old worn out dirty clothes with short hair dirty skin and dirty clothes:1.2), post apocalyptic grass and trash , ruins, (railways:1.1), destroyed power lines, dense fog, valley, (destroyed car vehicle in background:1.1), with plastic bags, sharp focus, depth of field, 8k, realistic, photorealistic, hdr, unsaturated colors, monchrome, low contrast, (vintage grain analog photography:1.1), underexposed, (wilderness overgrown with grass and bushes:1.3) , (yellow clouds and dense fog:1.1) , diffuse lighting, realistic proportions, (35mm film, kodak, DOF:1.1)
(worst quality, low quality, illustration, 3d, 2d, painting, cartoons, sketch), model, beautiful, clean, jewelry,( looking into camera:1.4), long hair, outfit, style,
checkpoint: realisticvision
sampler: Euler a
photographic frontal flashlight LORA influence
The basic motif can be modified in typical lighting situation by using dedicated LORA networks trained on stylistic aspects. We can dose the influence of this network within the render process, to control the outcome to our beloving.
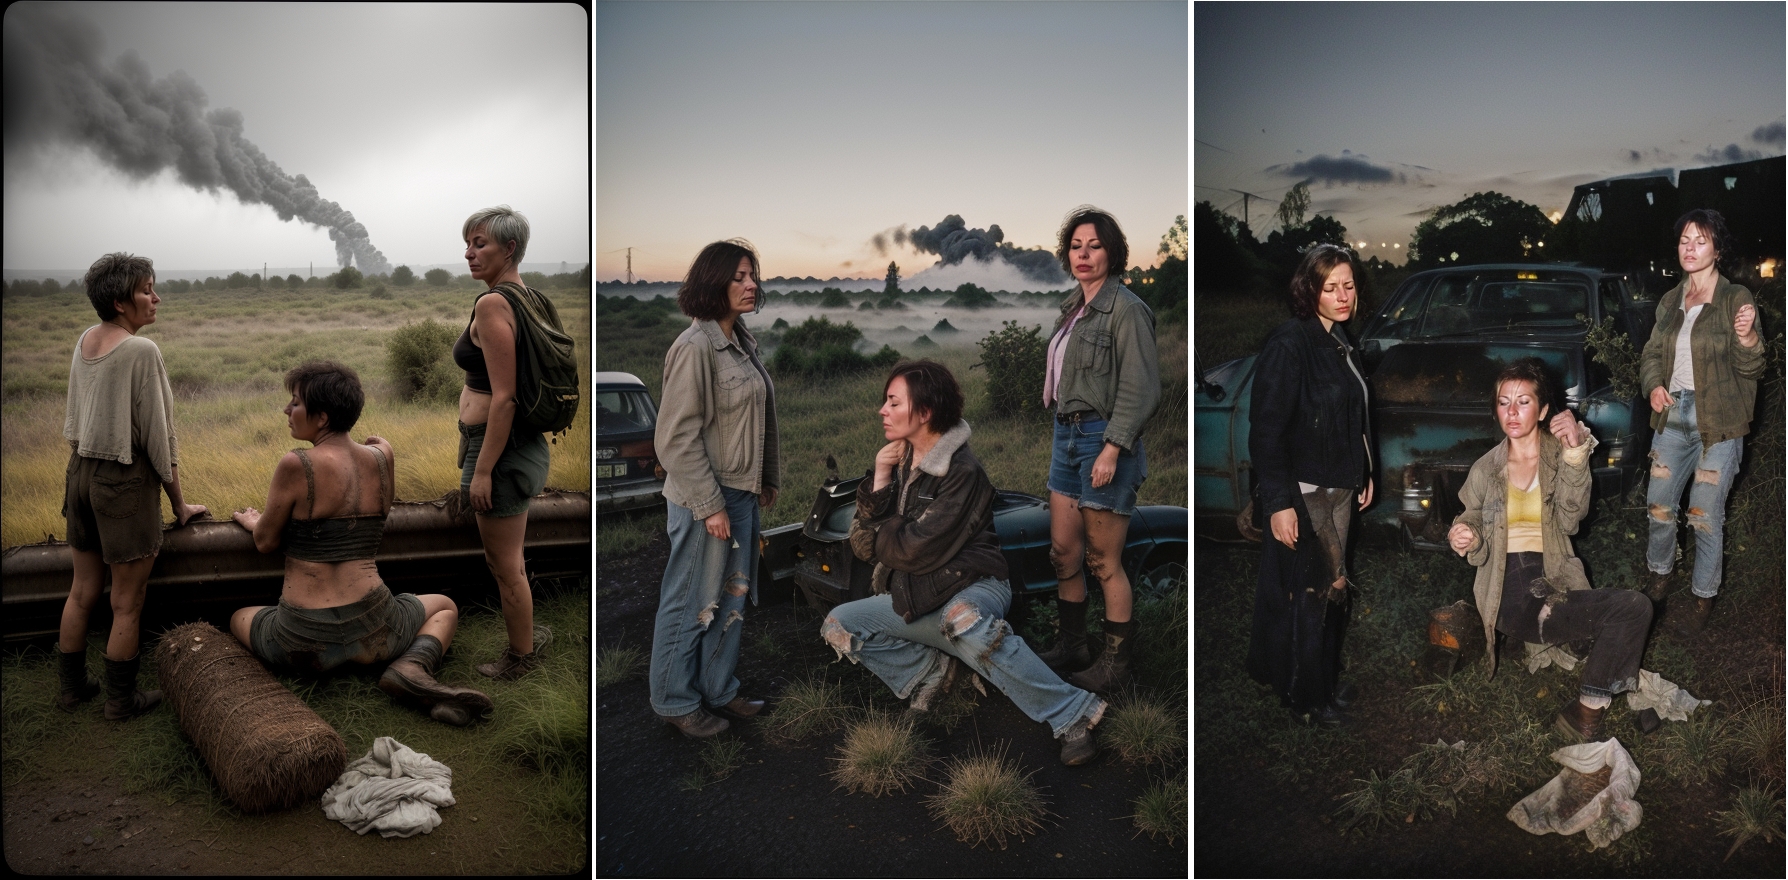
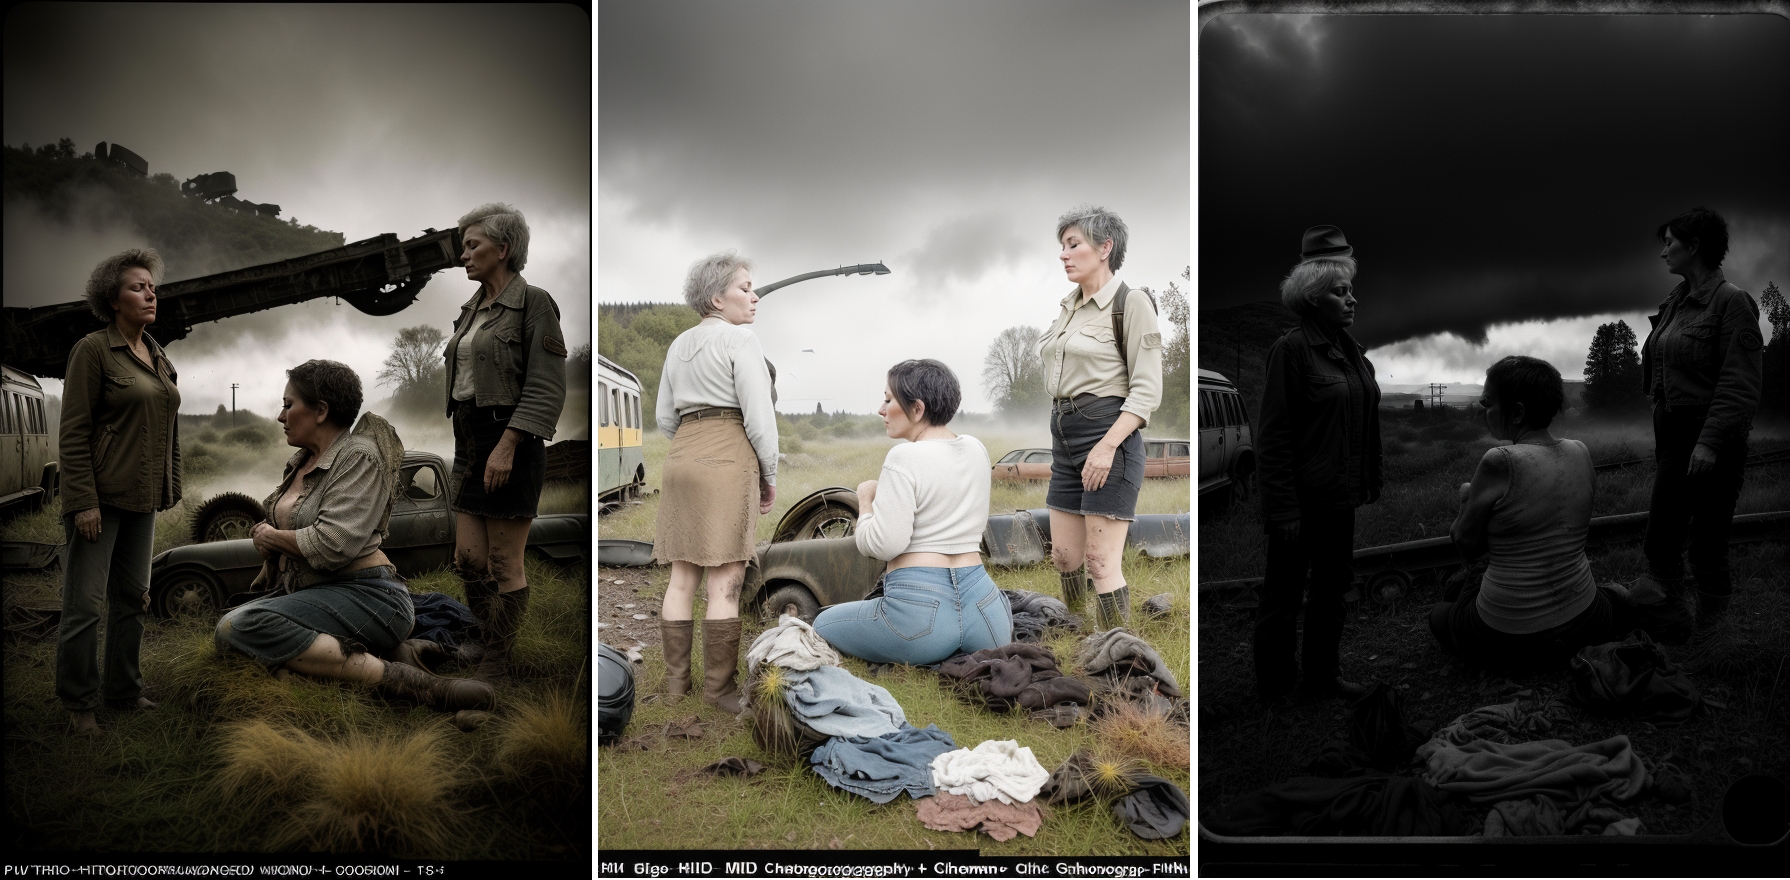
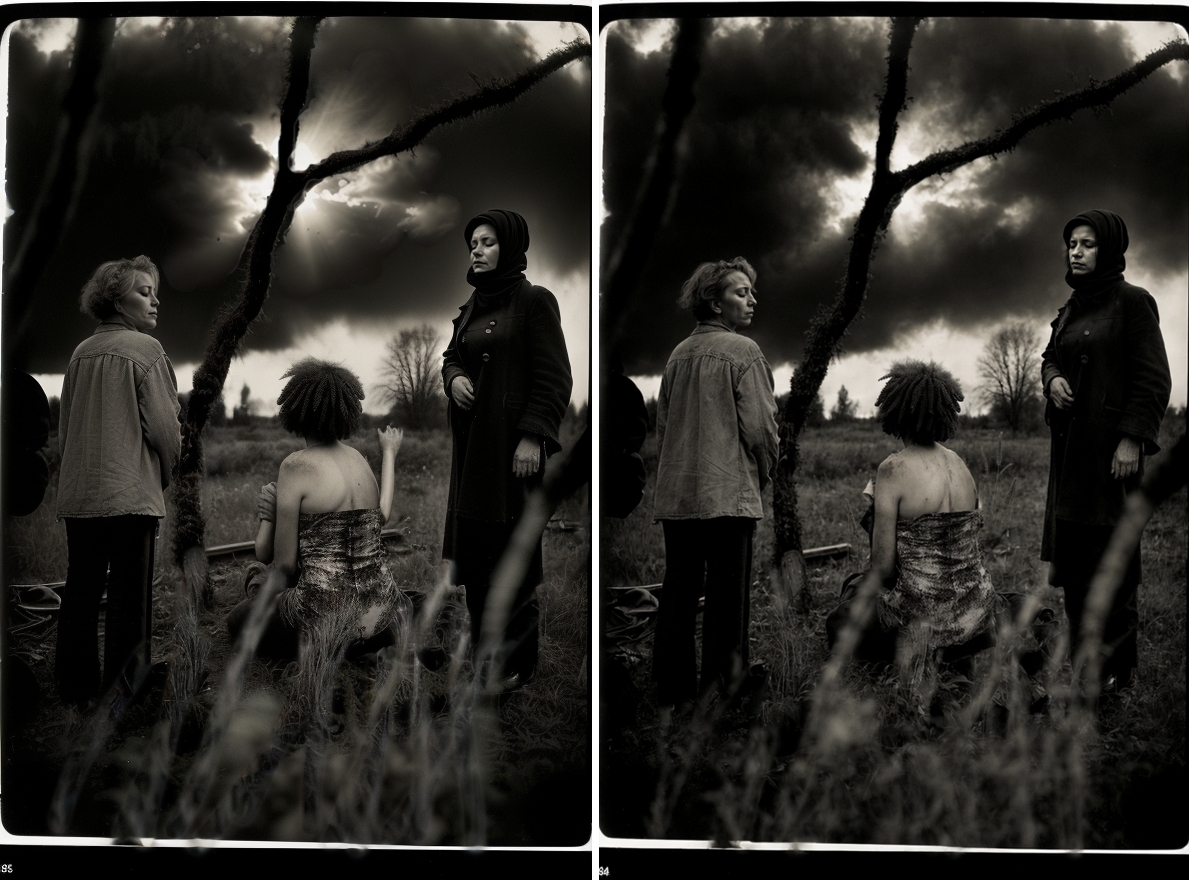
pinhole photography LORA influence
pinhole photography style LORA
analog film photography LORA influence
The influence of LORA’s to the original image can significantly change the basic image. Especially if the LORA itself is trained with image data that is in conflict with the desired motif. In this example, the mostly vintage sepia toned photography rendering is pushed into a surreal direction through conflicting color schemes and details.
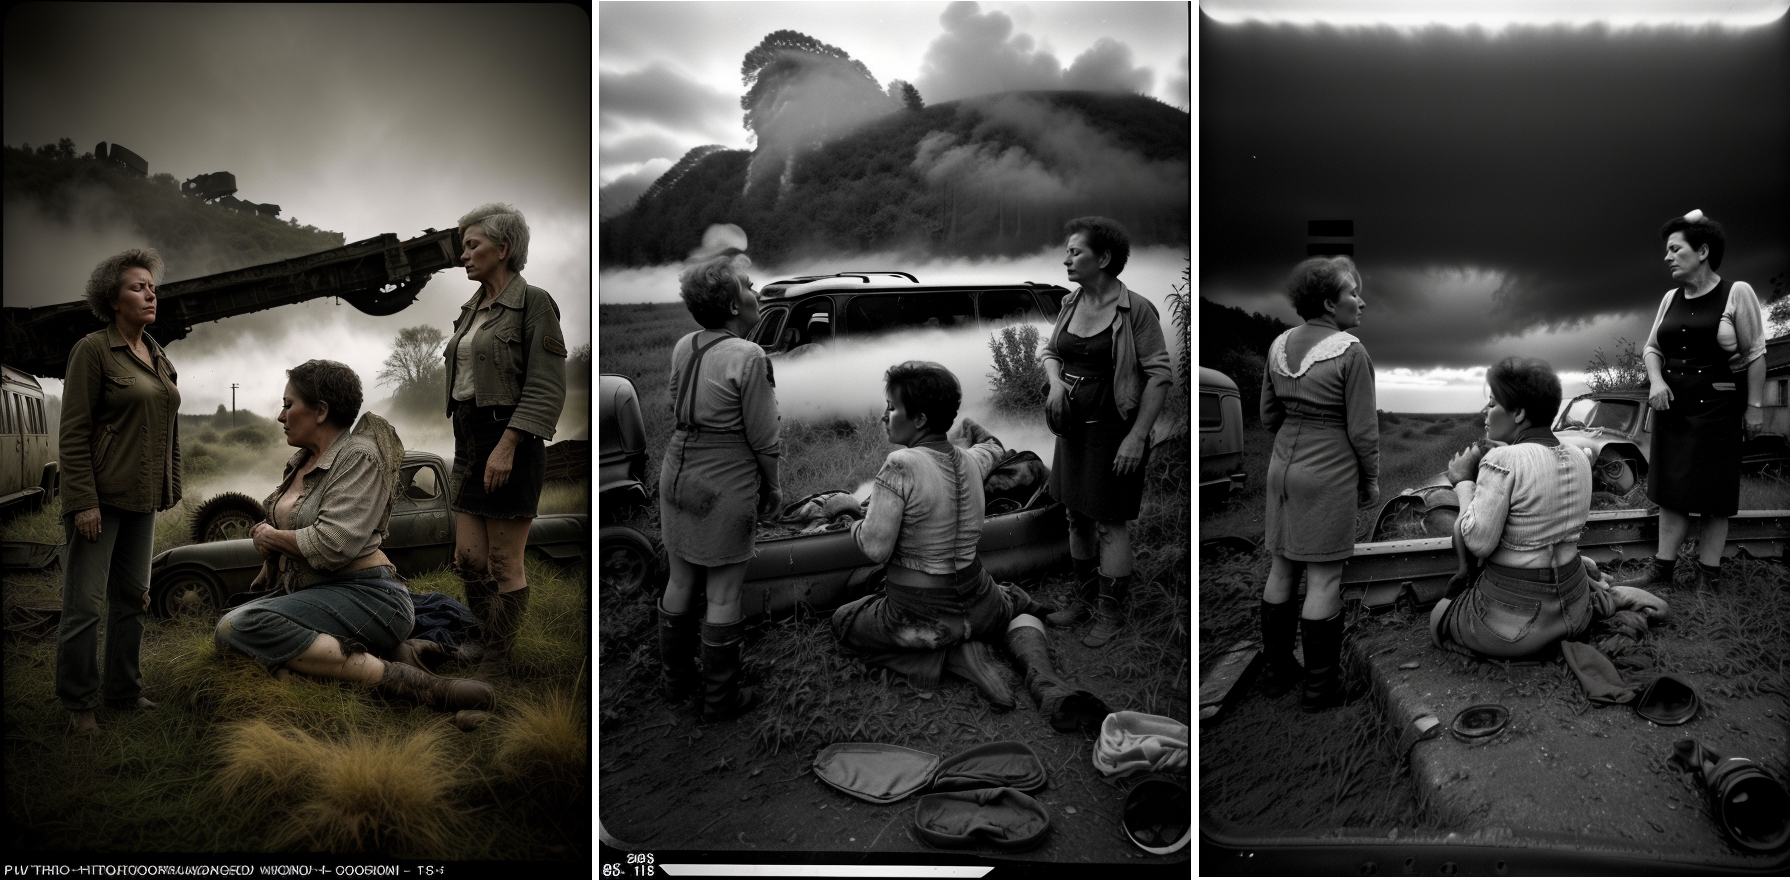
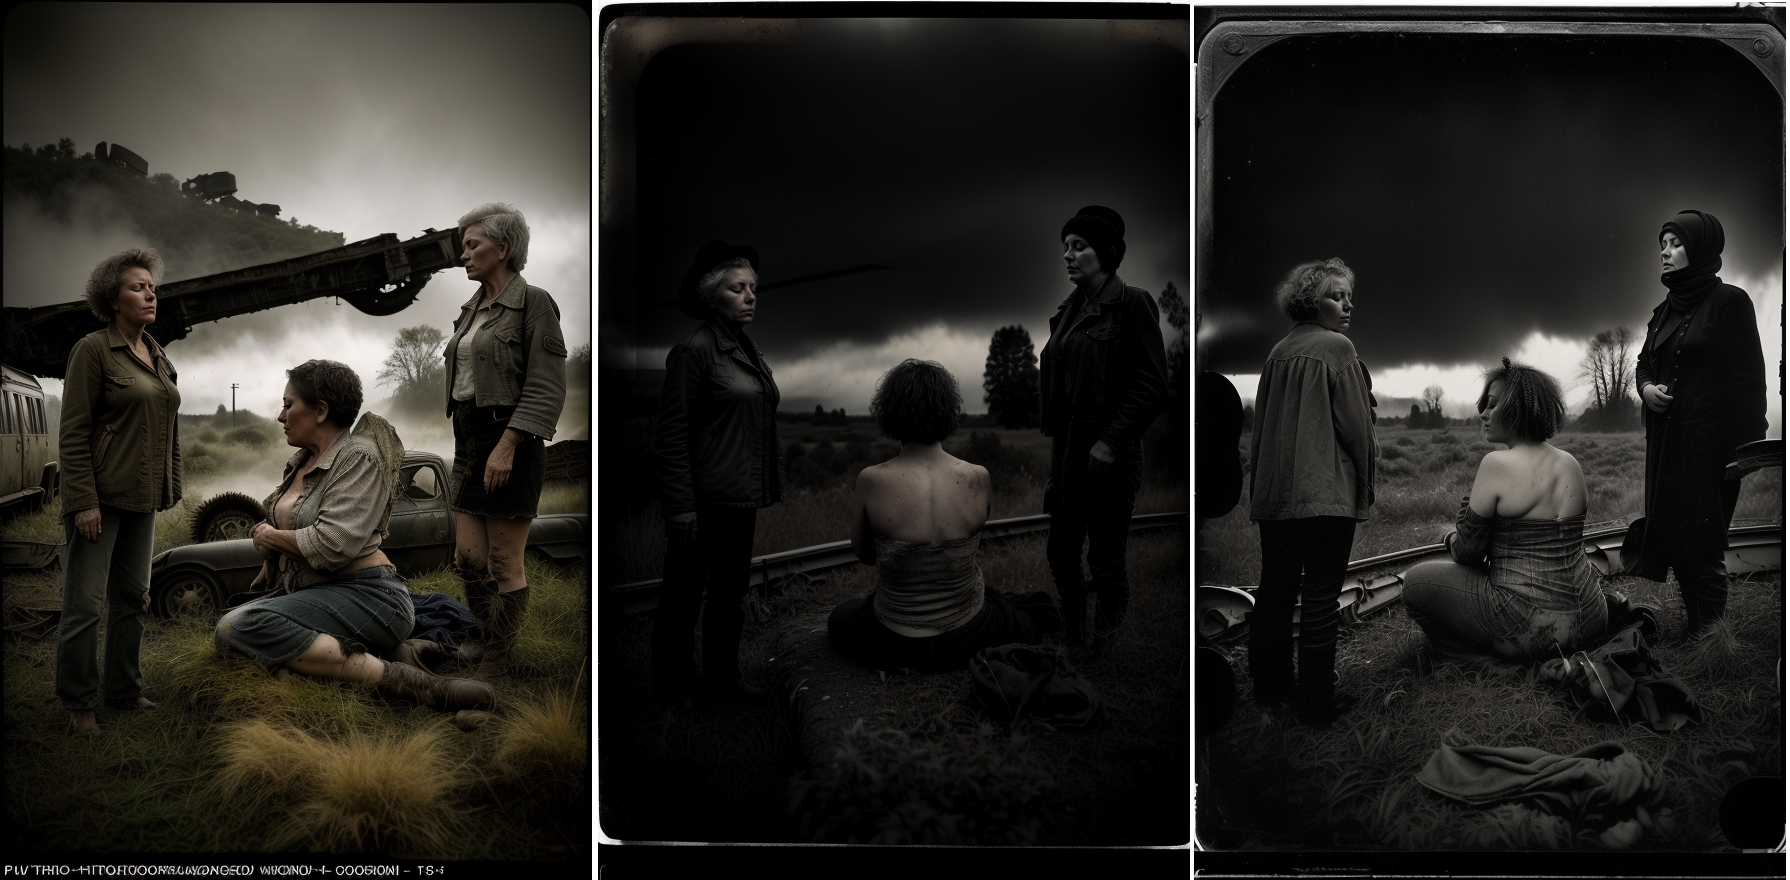
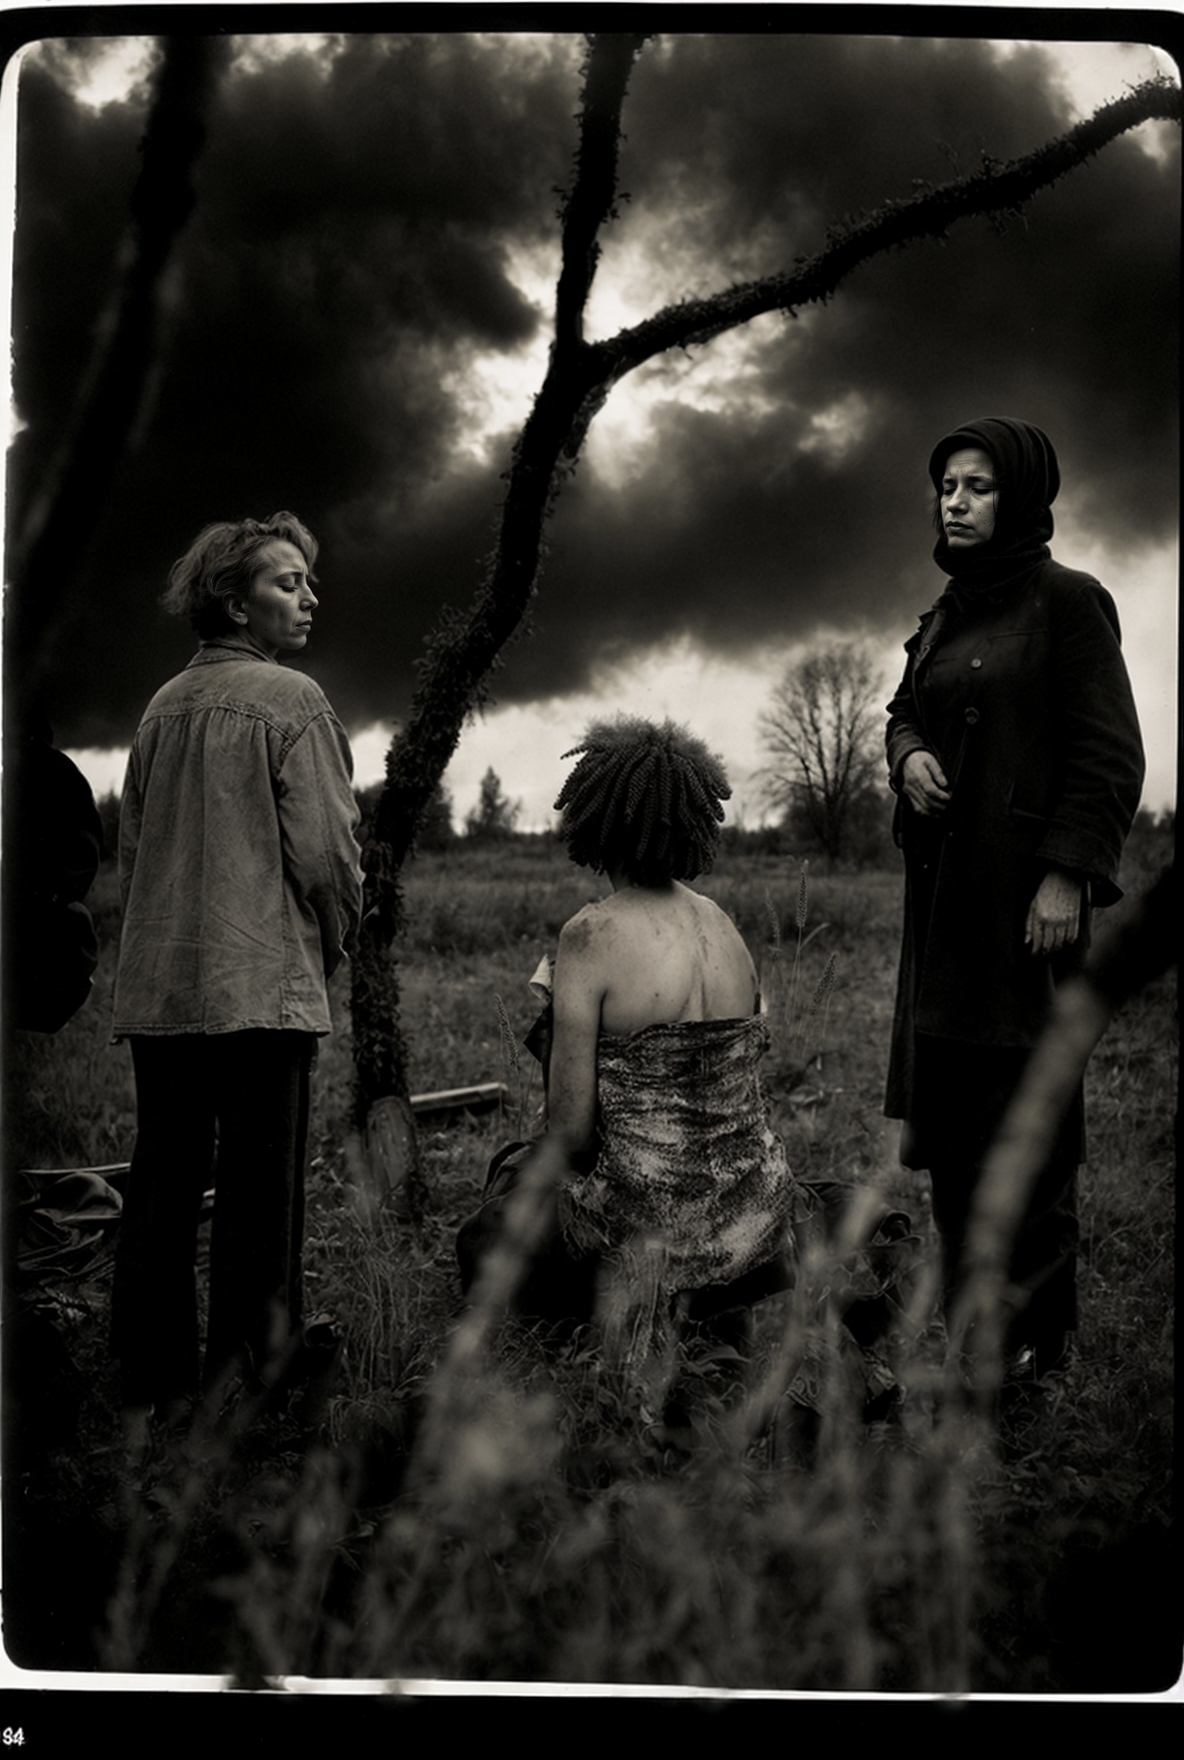
light exposure LORA influence
The light exposure is a crutial aspect in film and photography design. With this LORA, it is possible to influence the rendering in under- or overexposure. As it works somehow in this case, this LORA needs to be used in a very sensitive way, as it is very influenctial to the motif itself.
stylistic embedding influence
Embeddings are another option besides the LORA’s to influence the render process. As embeddings are trained with much less data, they cannot be as versatile as the LORA models. Indeed, for specific applications, they can be very useful.
advanced composition and finish
Having this many options to manipulate the image as a whole, we can also add details and composition elements to the image manually by collage or inpaint drawing. For now, this is NOT a very precise workflow, but some iteration and good prompt, drawing & LORA balance we can come up with tremendous results.
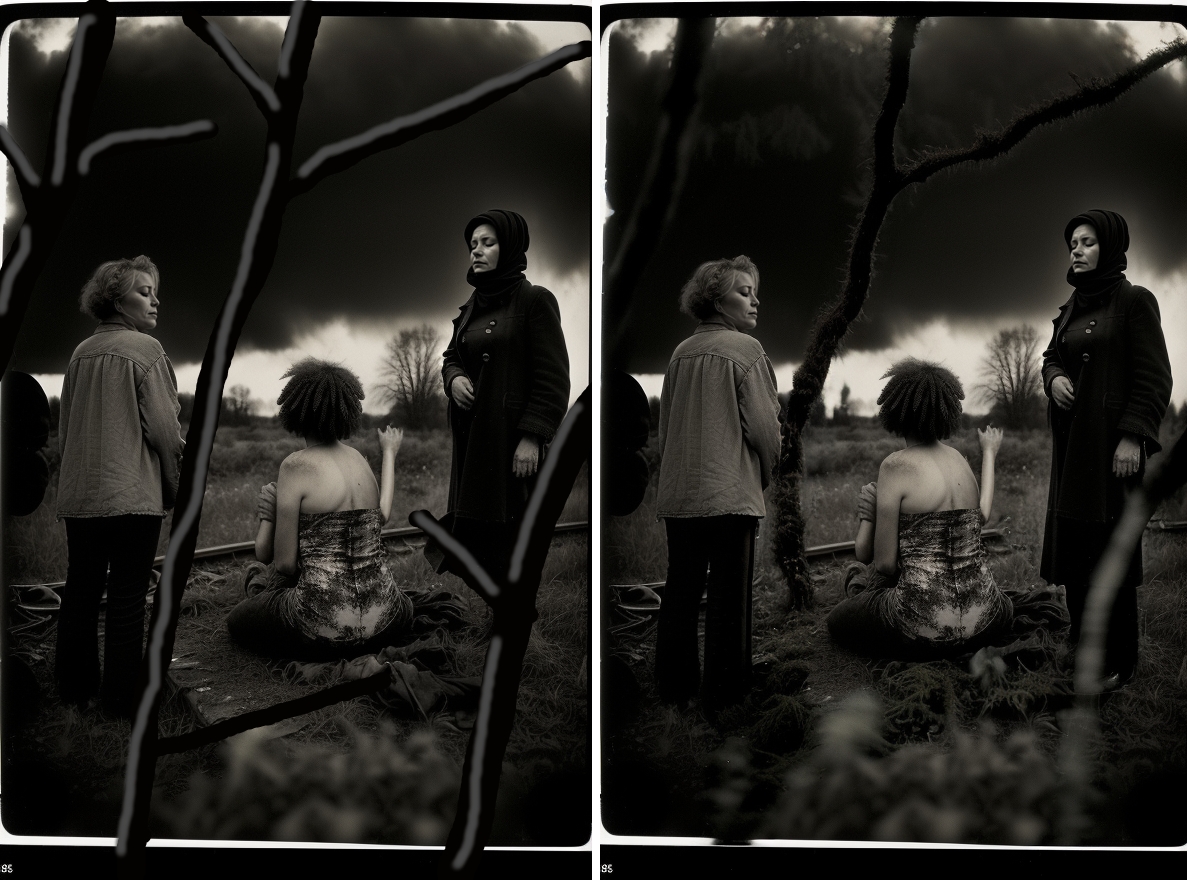
There is an obvious problem arising when adding layers of change to the original image: the components slightly diverge from each other, creating the impression of a surreal collage of elements because of unrealistic lighting situations or colors. This issue can be solved by running the whole composition through an low denoised img2img & upscale rendering with the inital prompt. This can create a very plausible and high res result from the collaged previous result.
color photography example
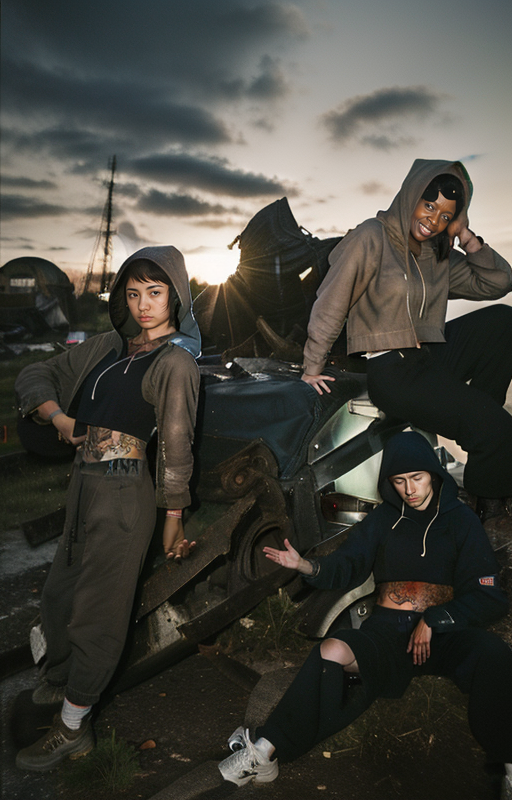
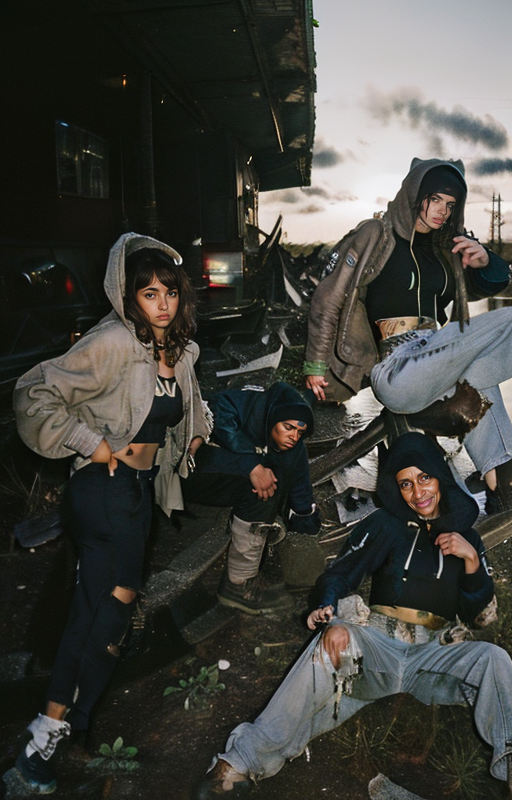
With more color and stylistic need comes the need for a more versatile setup. Again, based on a segmentation map, we create a basic composition filtered by a frontal flash trained LORA. The more LORAs used, the more diffuse the result becomes – like deformed faces, limbs and many more. To fix this in the first place, we can apply a facial detail Network to the pipeline to already fix the faces in the creational process.
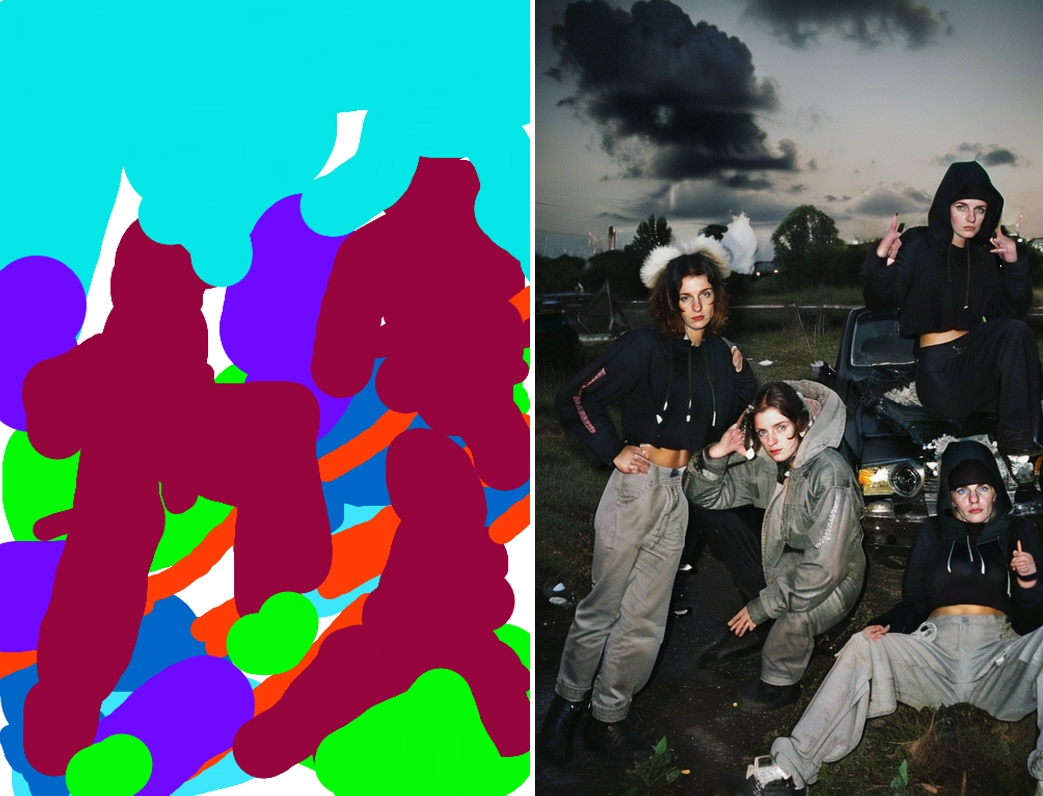
( realistic analog photography:1.1) of (portrait of three hooded female twens androgyn stylish european mechanics person in street style hoodies, funny posing in damaged distressed dirty clothing inbetween damaged demolished rusty military wrecks and trash, wilderness nature grass field in oily water:1.3), railroad railways and pipelines , grass overgrown landscape and fields ,( blurry double exposed, fog, foggy and valley, dark clouds in background:1.2), (realistic proportions:1.2), (hand pose, crop top fancy:1.1), triadic unsaturated colors palette, DOF, 50mm portrait photography analog,steet style,
(worst quality, low quality, illustration, 3d, 2d, painting, cartoons, sketch : 1.2), deformed iris, deformed face, clean, jewelry, long hair, outfit, style, label, typo, font, watermark, sign, letters, wide angle, fisheye,
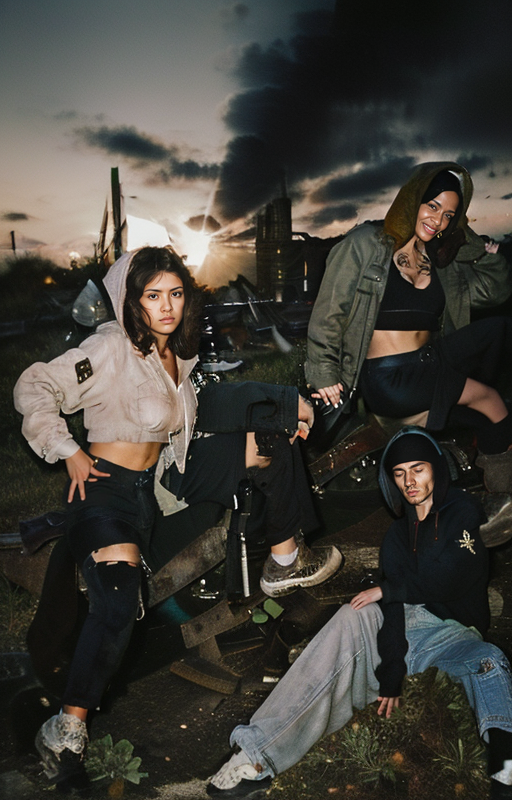
face fixing issue
The face fixing tool comes with the disadvantage that all recognized faces will be interpreted the same way. There will be the same person in different views.
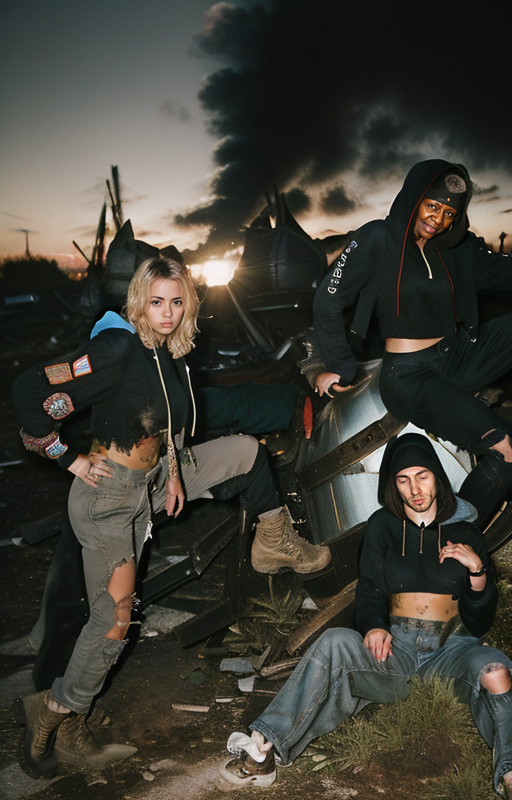
Using the ADetailer Tool with a segment tag „[SEG]“ makes it possible to adress different faces in one prompt.
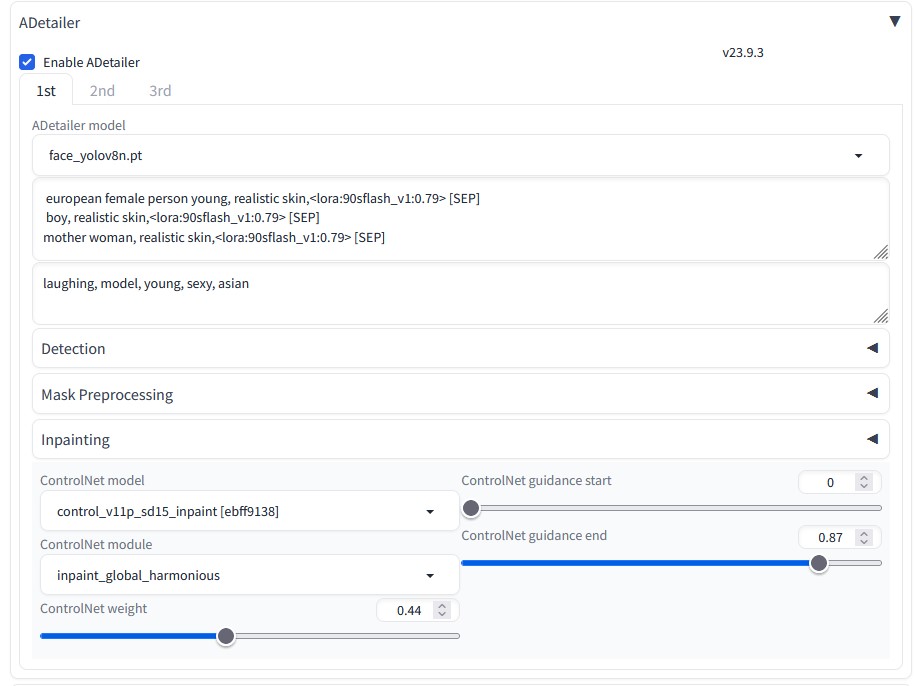
This will create three fixed faces in three variations in one prompt.


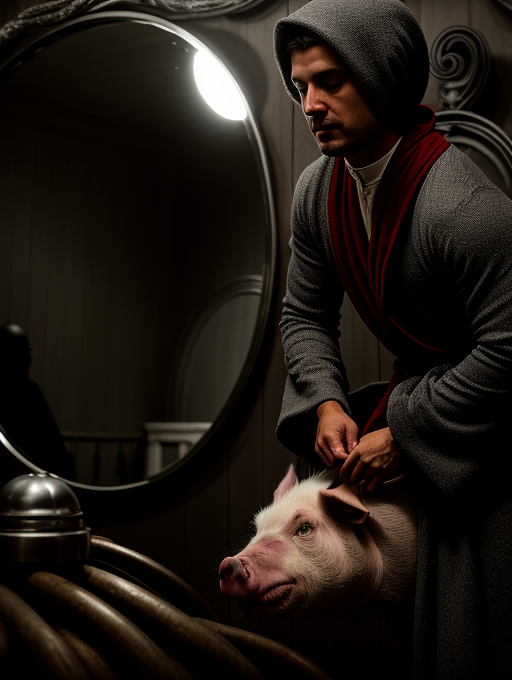
surreal studio composition
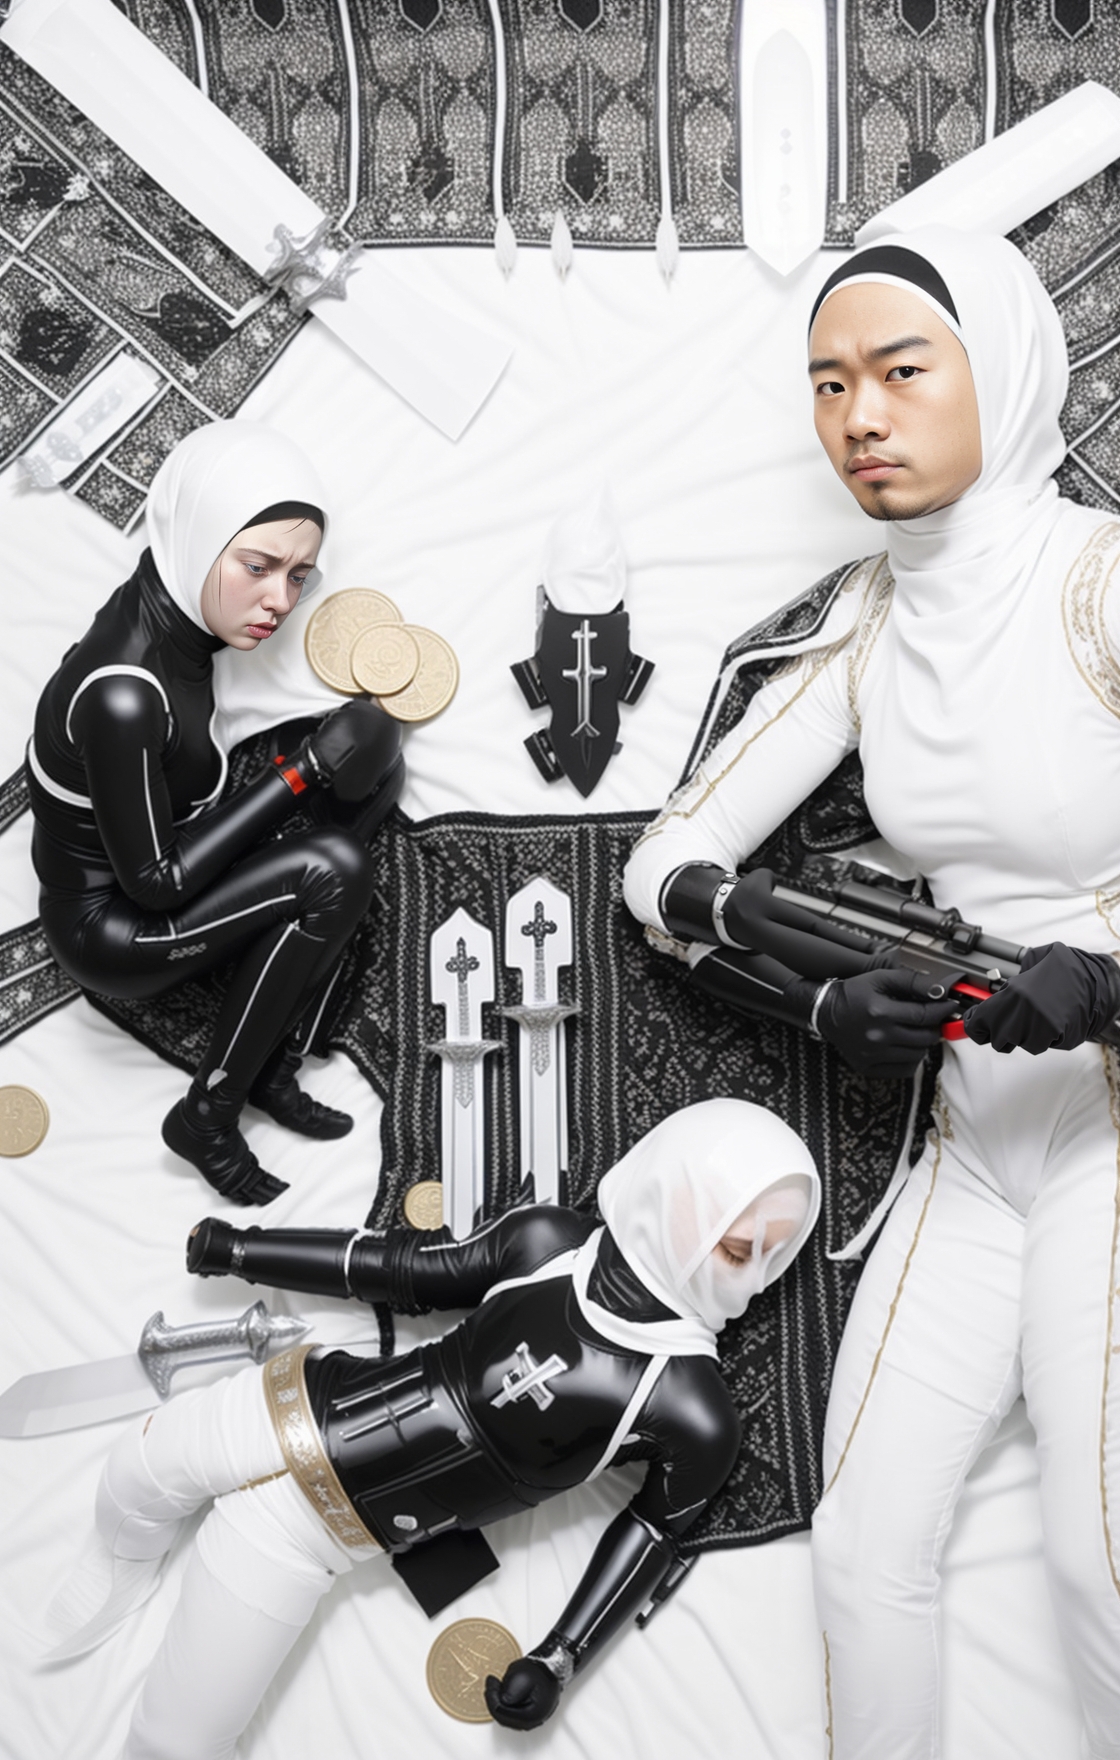
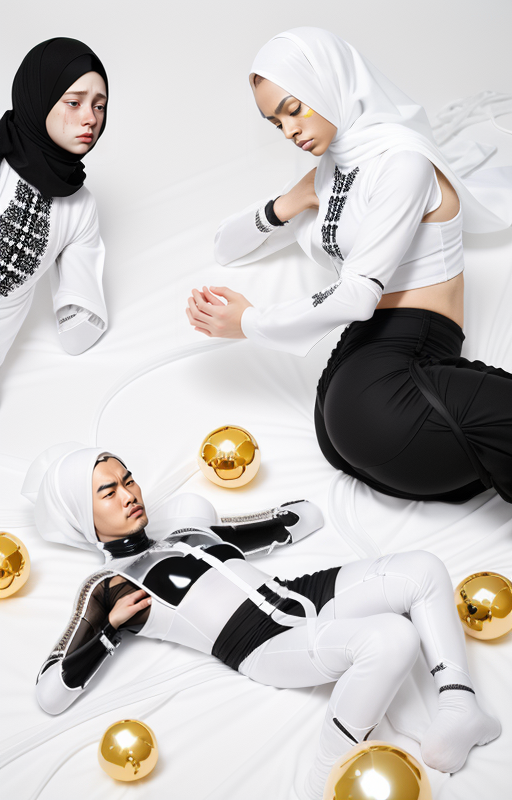
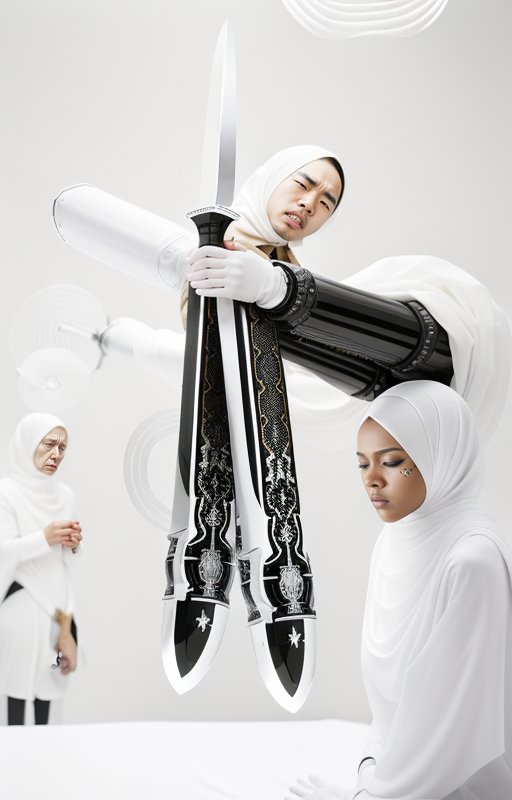
composition step by step
We start of with a prompt directed setup that defines both the motif, lighting and style. The results vary in a typical range and look pretty „AI“ generated.

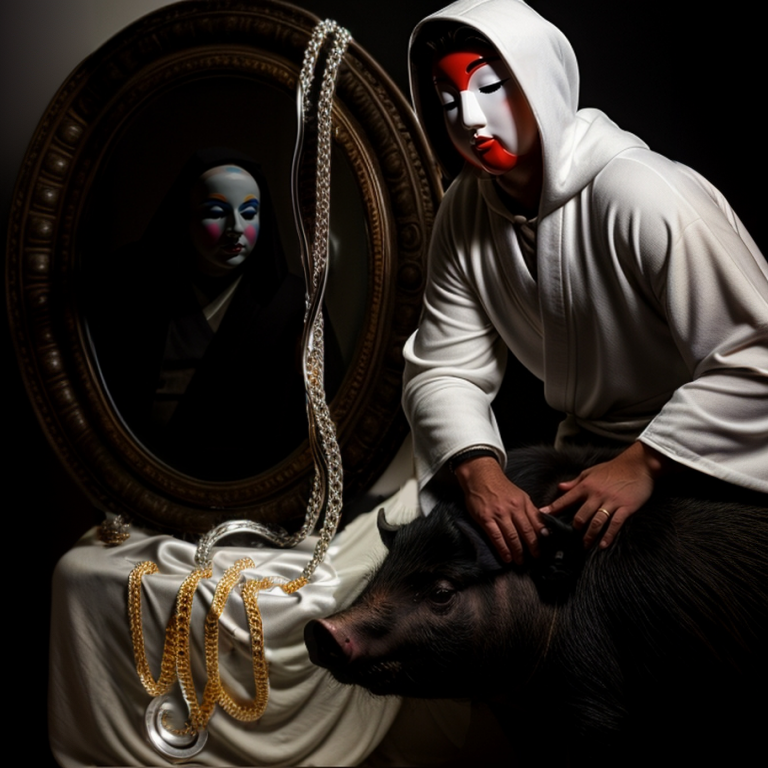
studio photography of futurist androgyn priest, ( a black wild hairy pig:1.2), big golden round mirror reflecting pig and priest, white weightless textile in background,
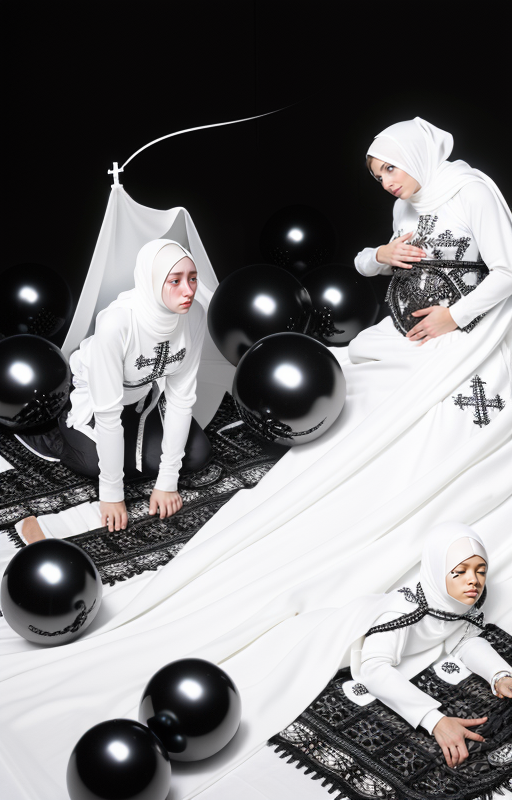
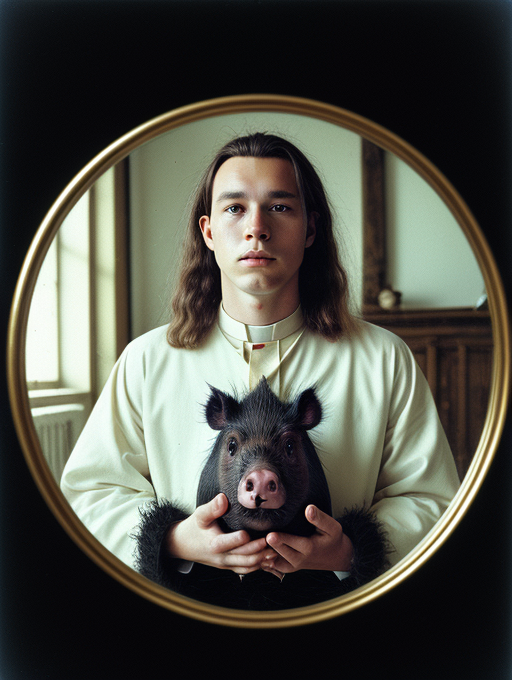
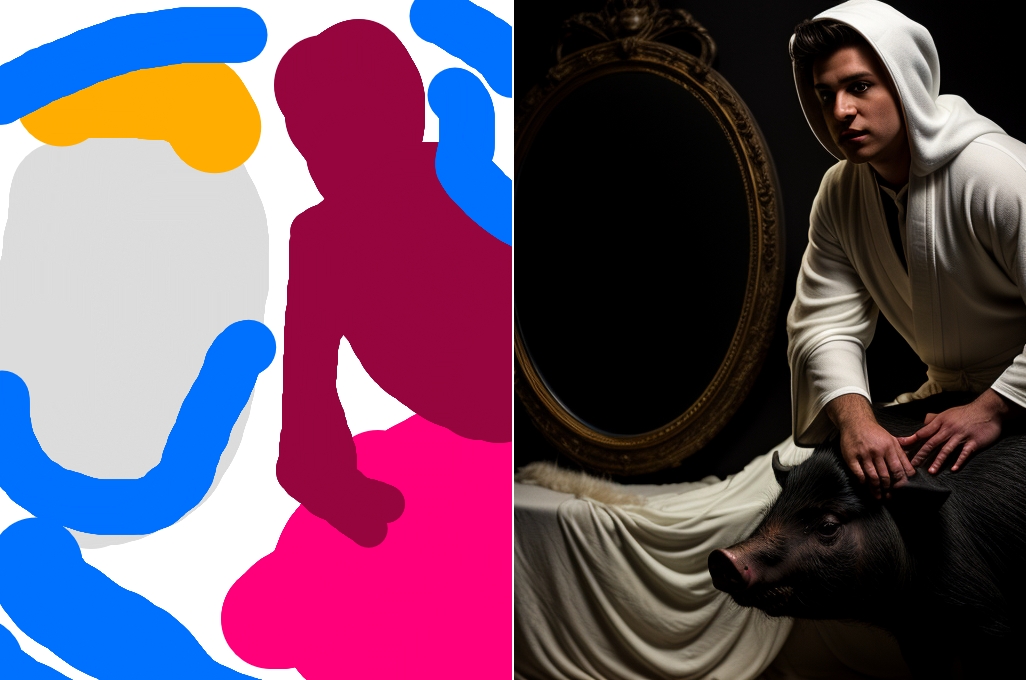
Using a segement map helps a lot to arrange the composition to a more elaborate setting. This one uses an additional exposure LORA to overexpose the photography like rendering.

studio photography of (futurist androgyn bald boy priest in red robe and hood street style stroking pig:1.02), ( a black wild hairy pig:1.1), (big golden baroque antique round mirror:1.1) reflecting pig and priest,
chains, metal, equipment, metal, chrome,
(black smooth weightless textile cloth wall hanging and diffuse bright light in background:1.1) ,
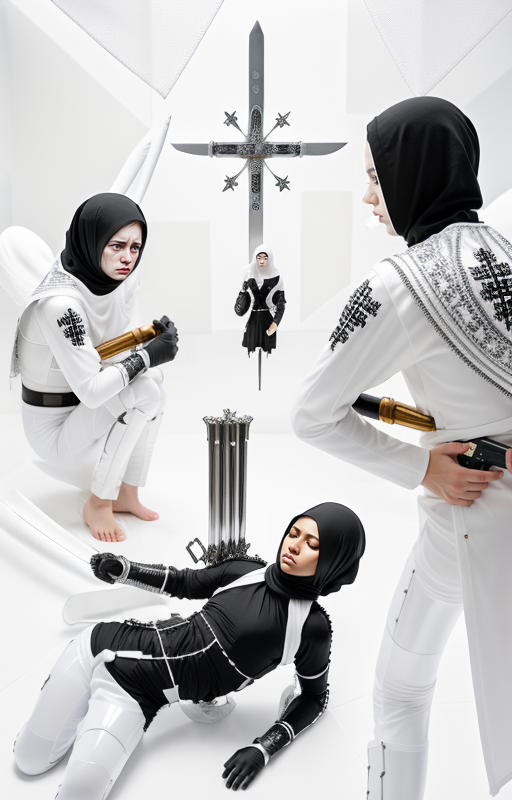
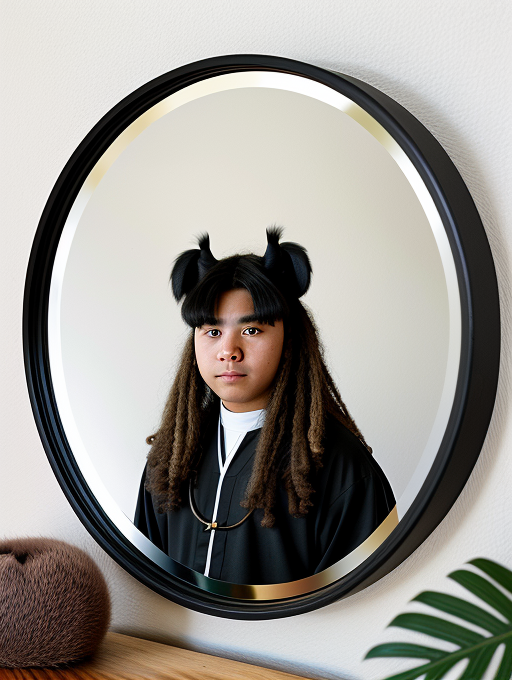
The elements in the motif are quiet unstable between each render, so it is necessary to introduce weights and more proper description.
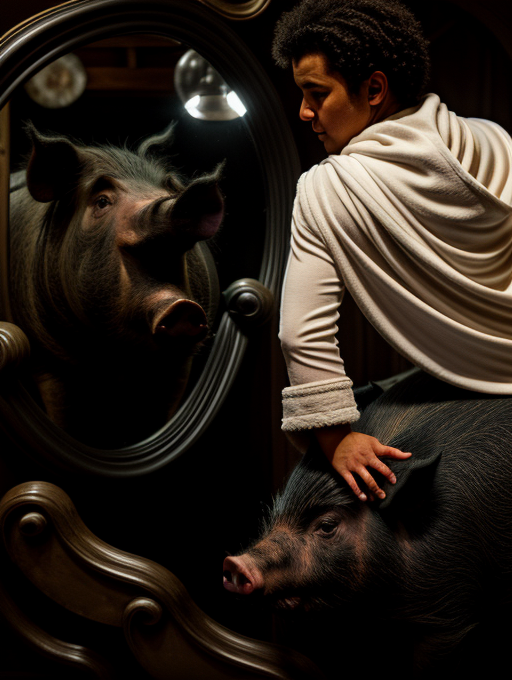

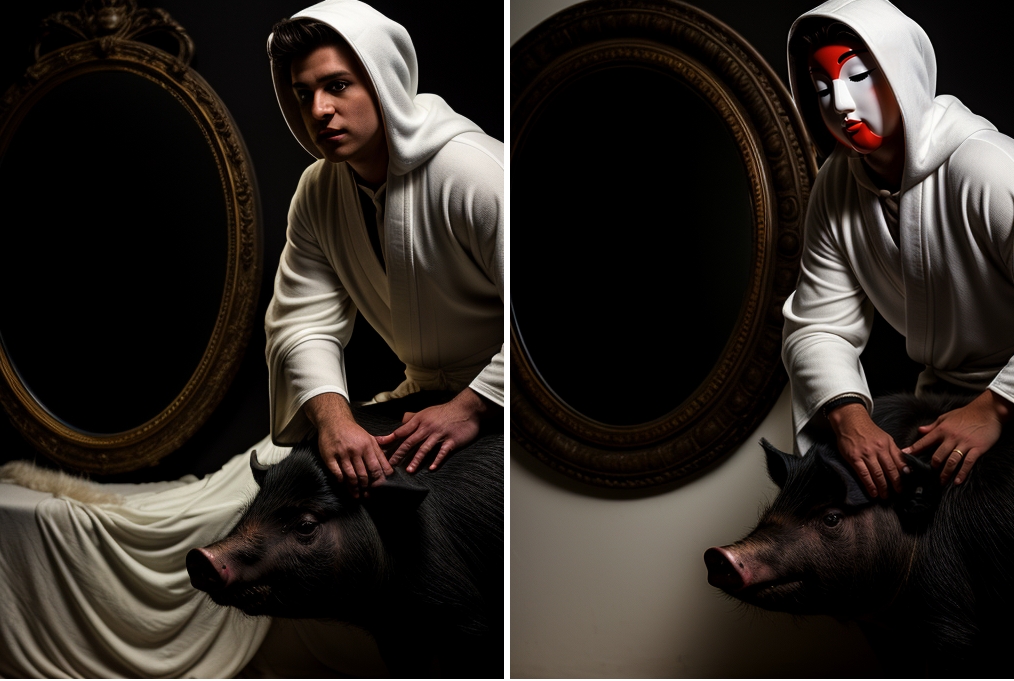
studio photography of (futurist androgyn young white boy with plastic skin shell face warpaint dresssed in white priest robe in hood street style leaning on and stroking black wild hairy pig:1.1), ( a black wild hairy pig:1.2), (big golden baroque antique round mirror reflecting scene :1.0) ,
(chains metal equipment metal chrome applications, traditional textile patterns :0.7)
(white illuminated smooth weightless textile cloth apparel wall hanging and diffuse bright backlight in background:1.1) ,
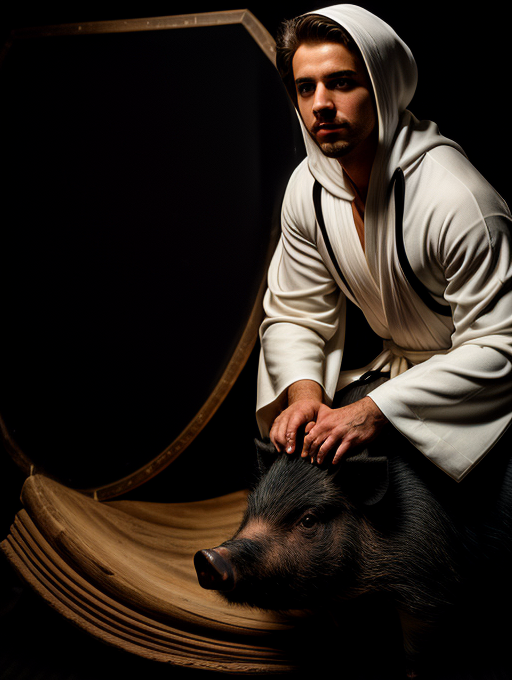
There are several intriguing details, we focus on especially as viewers besides the composition: eyes, faces, hands, persons, animals and more. Those elements can be sharpened especially with proper detail processing like ADetailer. Here we fix the hands and substitute the face with a more intessting geisha face mask.
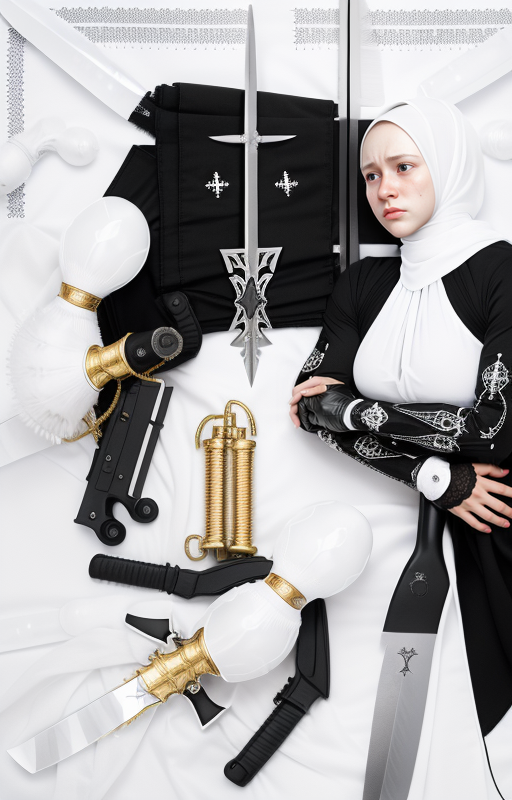
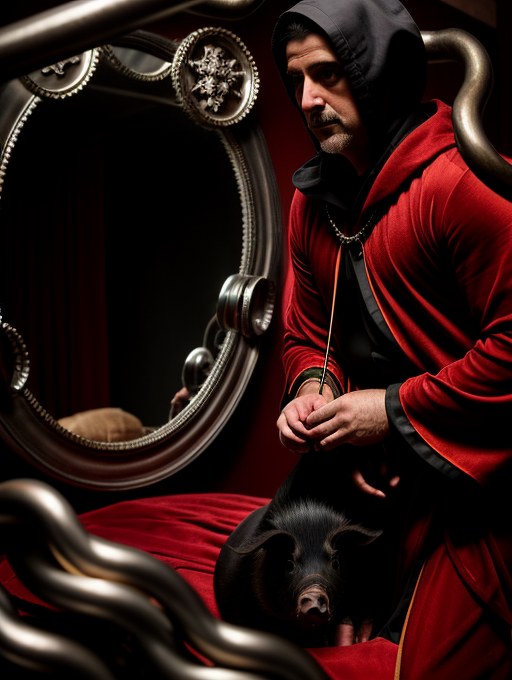
Along the way, we produce a lot of test renderings, that might have interessting details, we can reimport to the composition again. In this case, the white cloth and the mirror reflection is an interessting aspect.

If we want to add or change specific elements in the motif – there is no proper way around than to guide the renderer by manually drawing the elements by hand, marking them an using a proper prompt in the same style, like the overall composition.
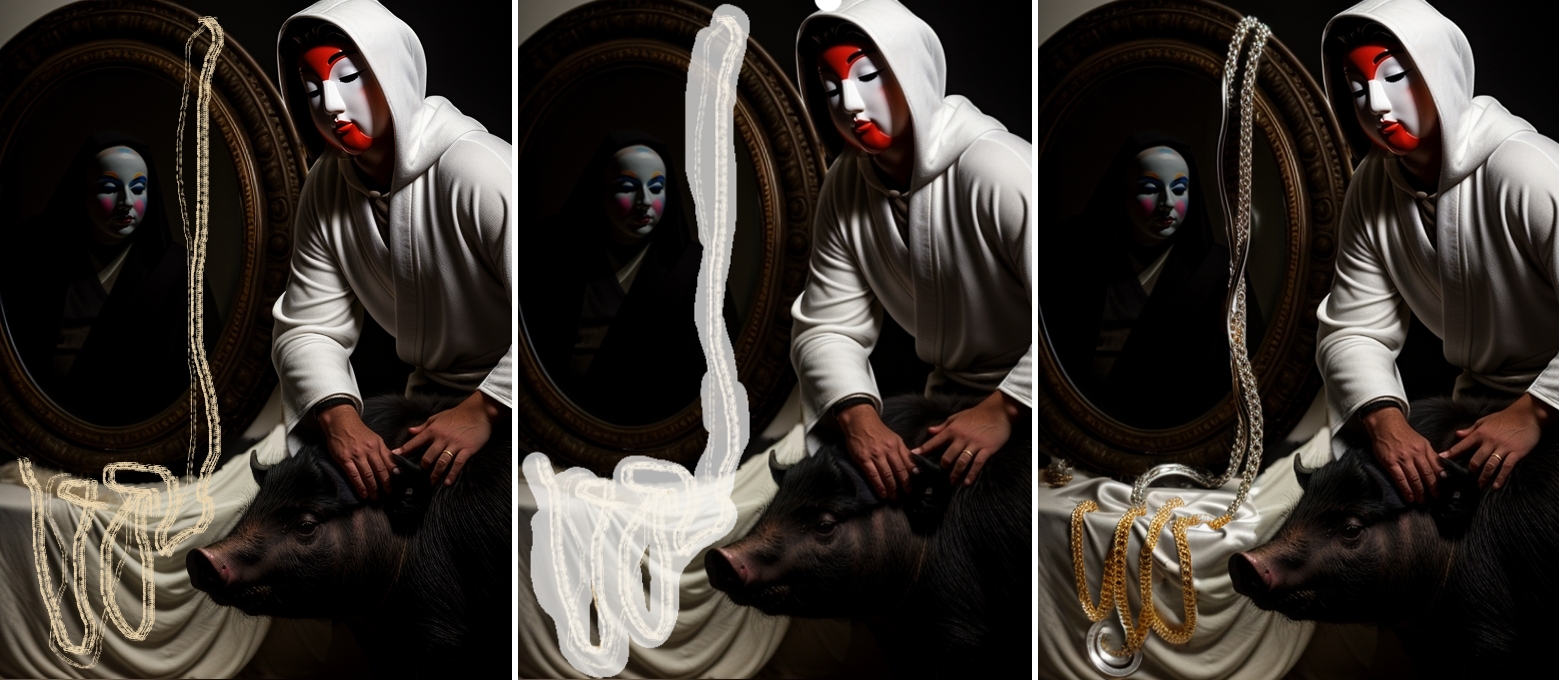
studio photography of ( christian traditional silver and gold chains, christian persian religious symbols and jewelry, curvy smooth curly, metal equipment metal chrome applications:1.1) ,
With controlNET inpainting module, we have a proper method to also enhance an existing motif. We can use the existing prompt to widen the image in all two dimensions guided by our prompt. This can be done with several other tools to – but this method gives the most consistent result.